How to Enable and Use Security Service by 10Web

Security is one of the most important aspects and we at 10Web put a lot of emphasis on it. Here’s how to enable and use 10Web security service.
Enabling your website’s security
Click “Enable now” from the Security subsection in the left menu:
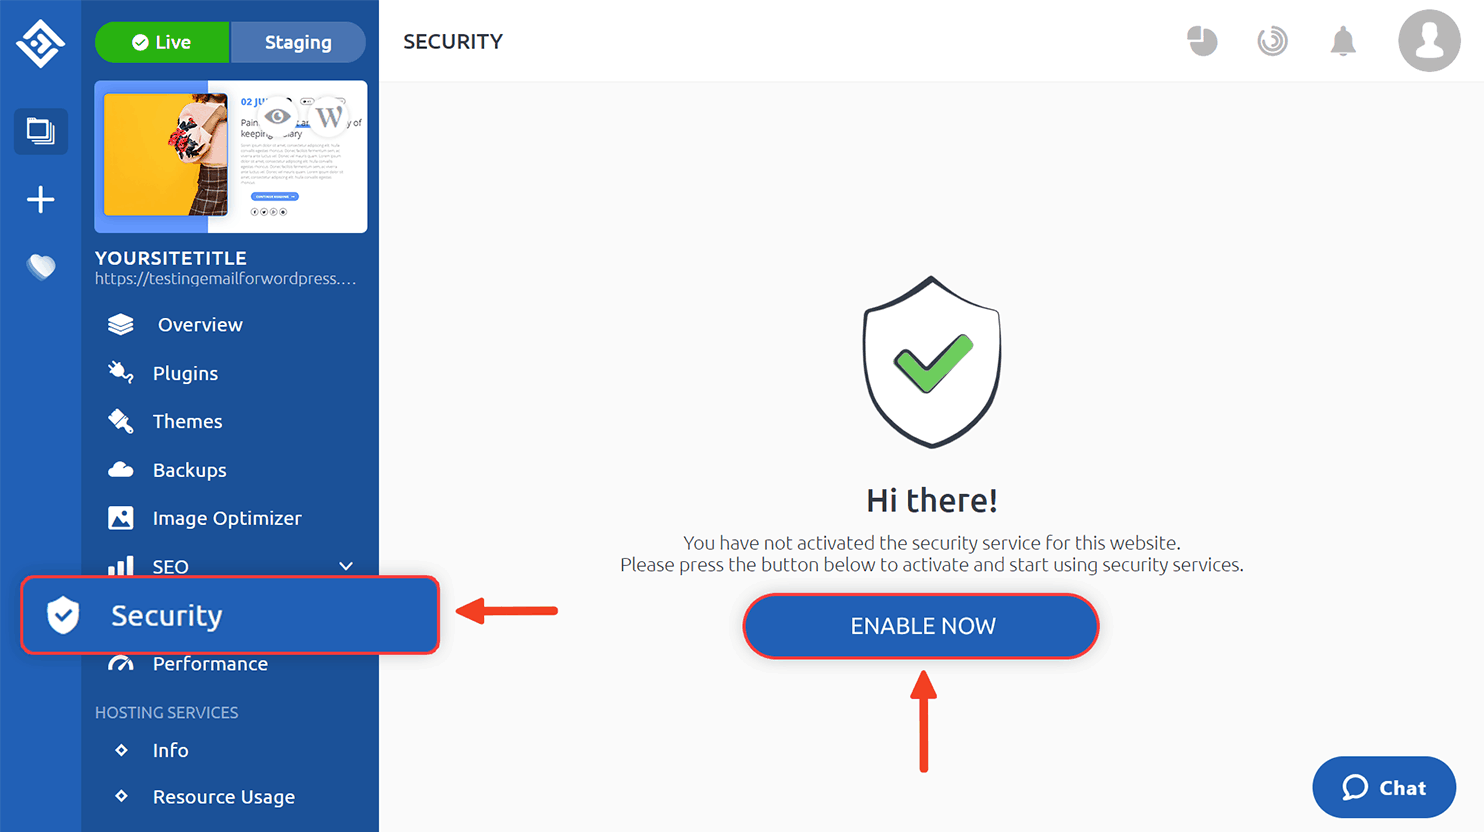
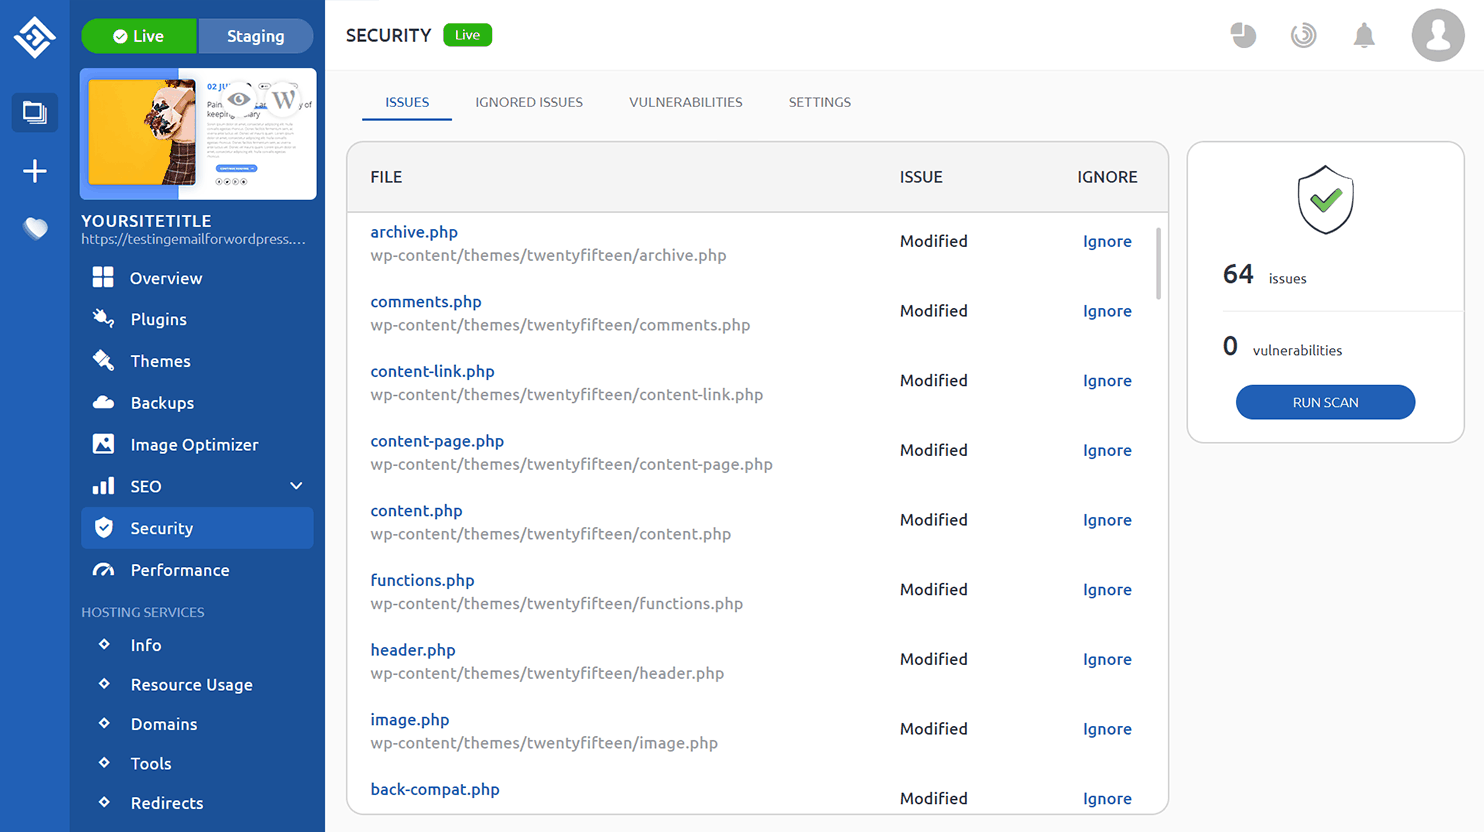
Done! You’ll see these security tabs and are ready to start using 10Web security.
Running a scan
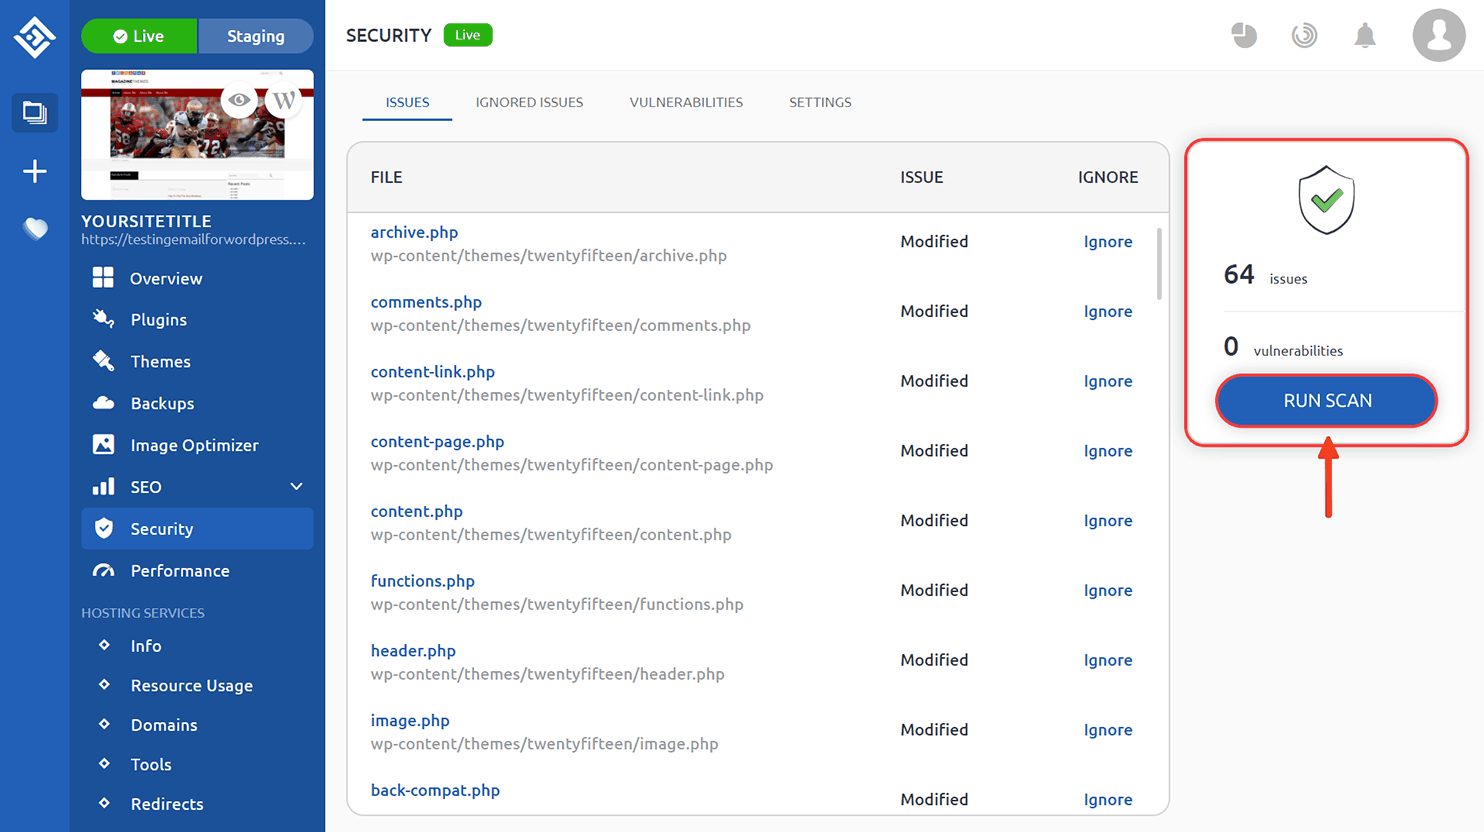
You can scan your website for issues and vulnerabilities as many times as you like. Just click “Run scan” from the right side of the screen:
Customizing the scan
The “Settings” tab is where you can turn particular aspects of the scan, such as WordPress or plugin vulnerabilities, on and off.
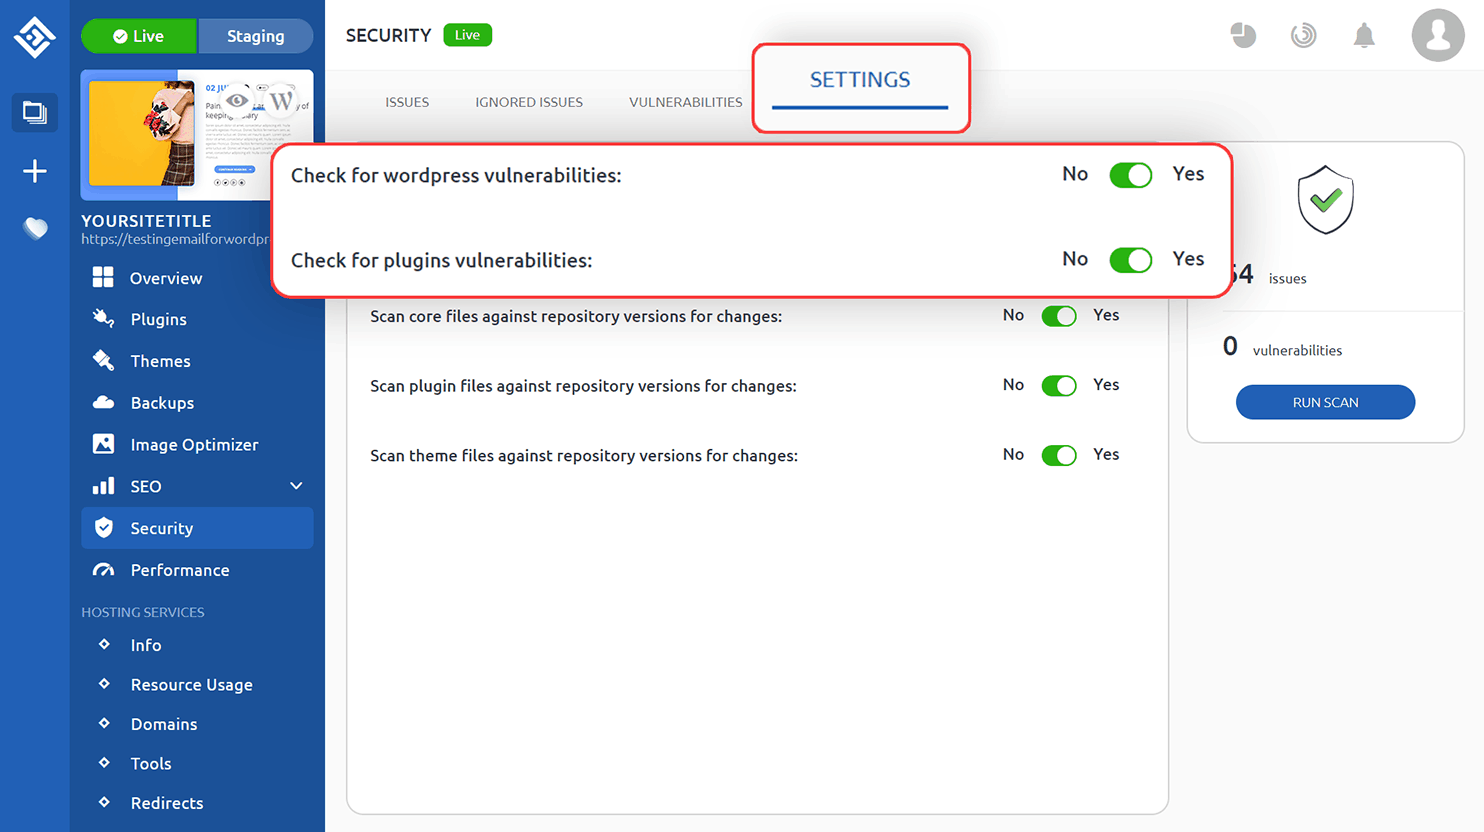
Our recommendation is to mostly keep all of these switches on “Yes:” better safe than sorry.
Dealing with security issues
The “Issues” tab shows all the recent modifications made to your files.
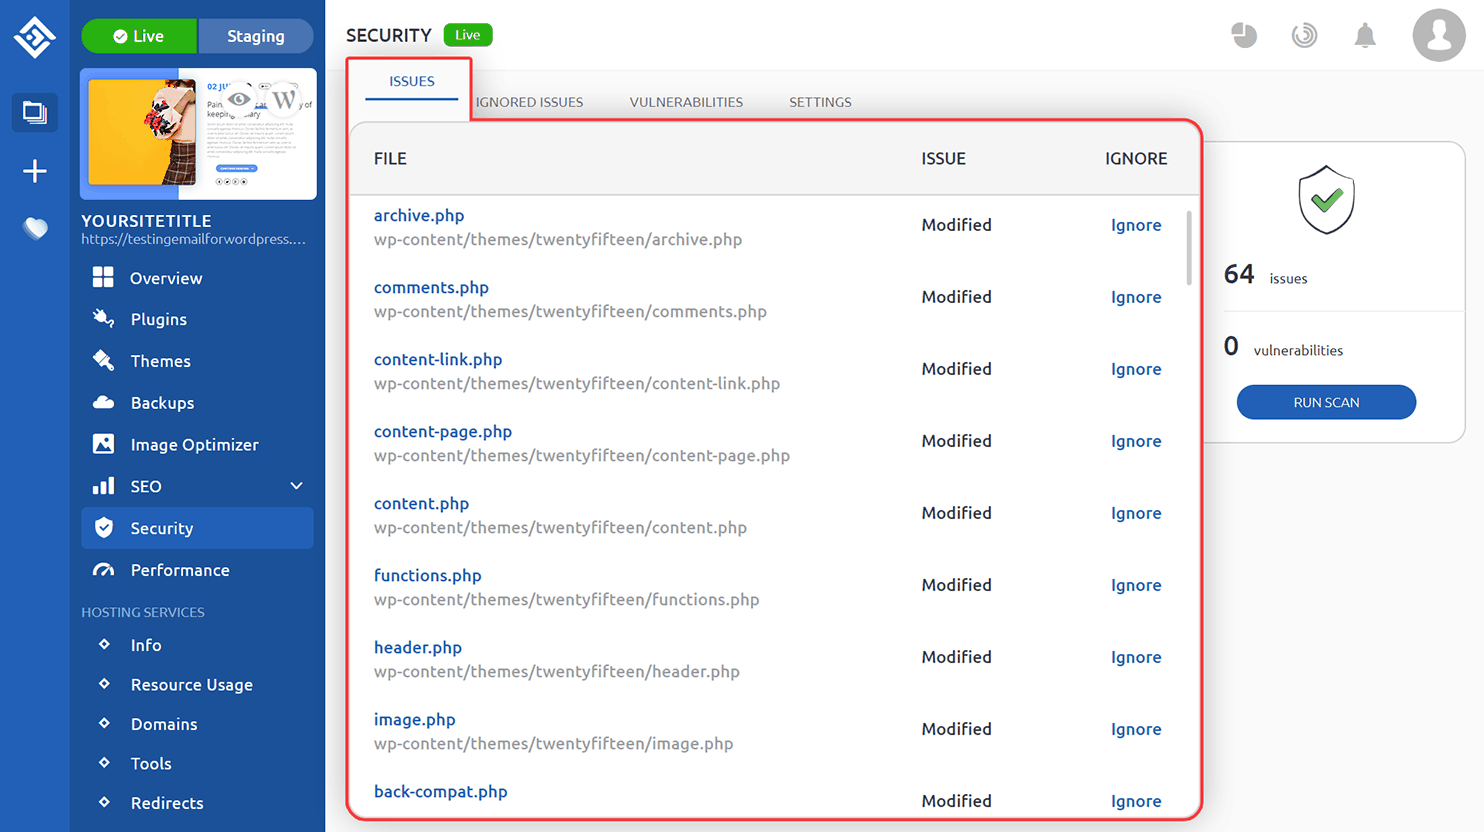
You can click on particular files to see details about the changes and easily restore earlier file versions if they were undesired.
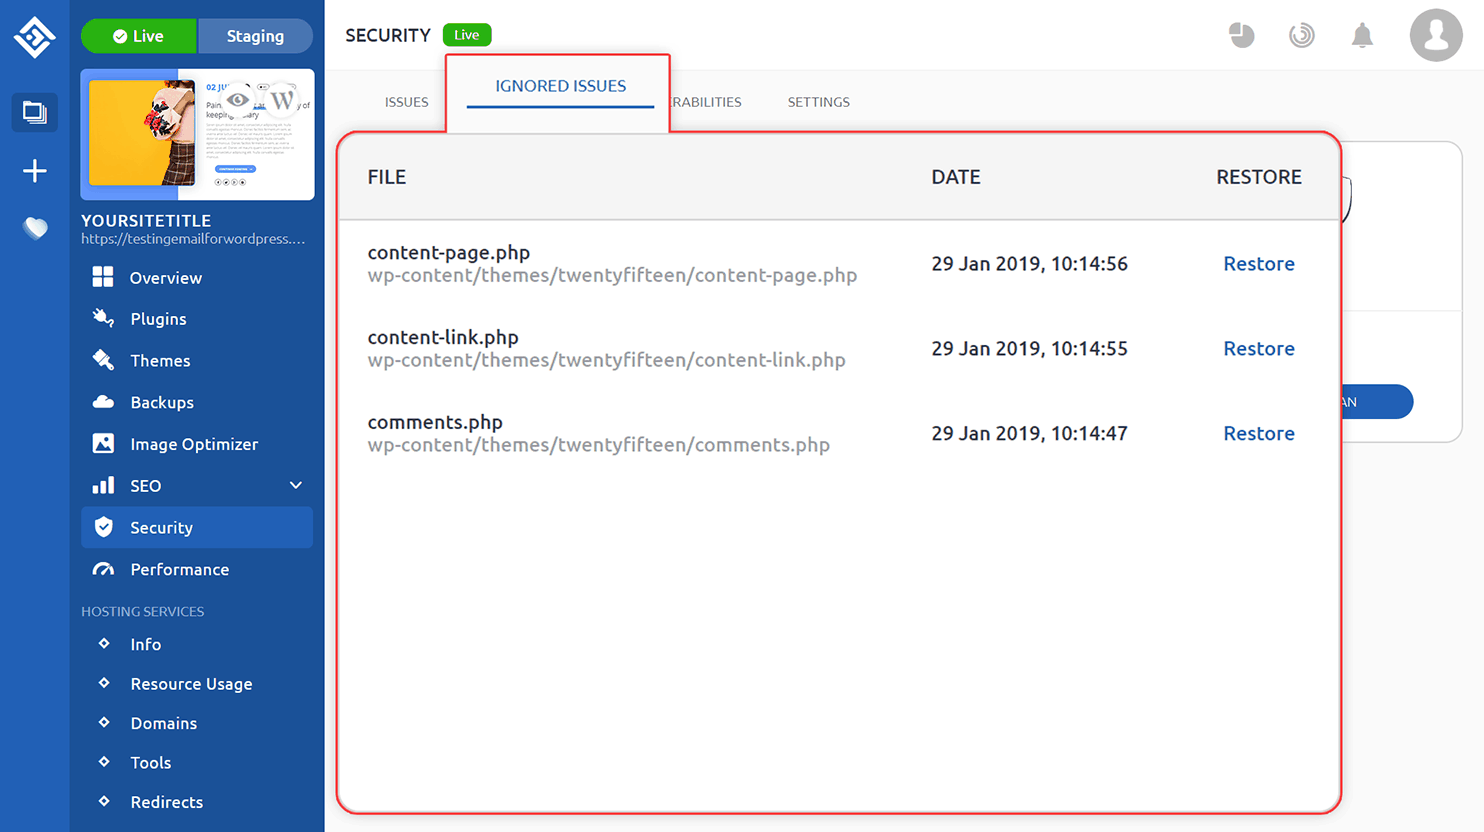
If the changes were authorized or implemented by you, you can click “Ignore” so they won’t show up in future scans.
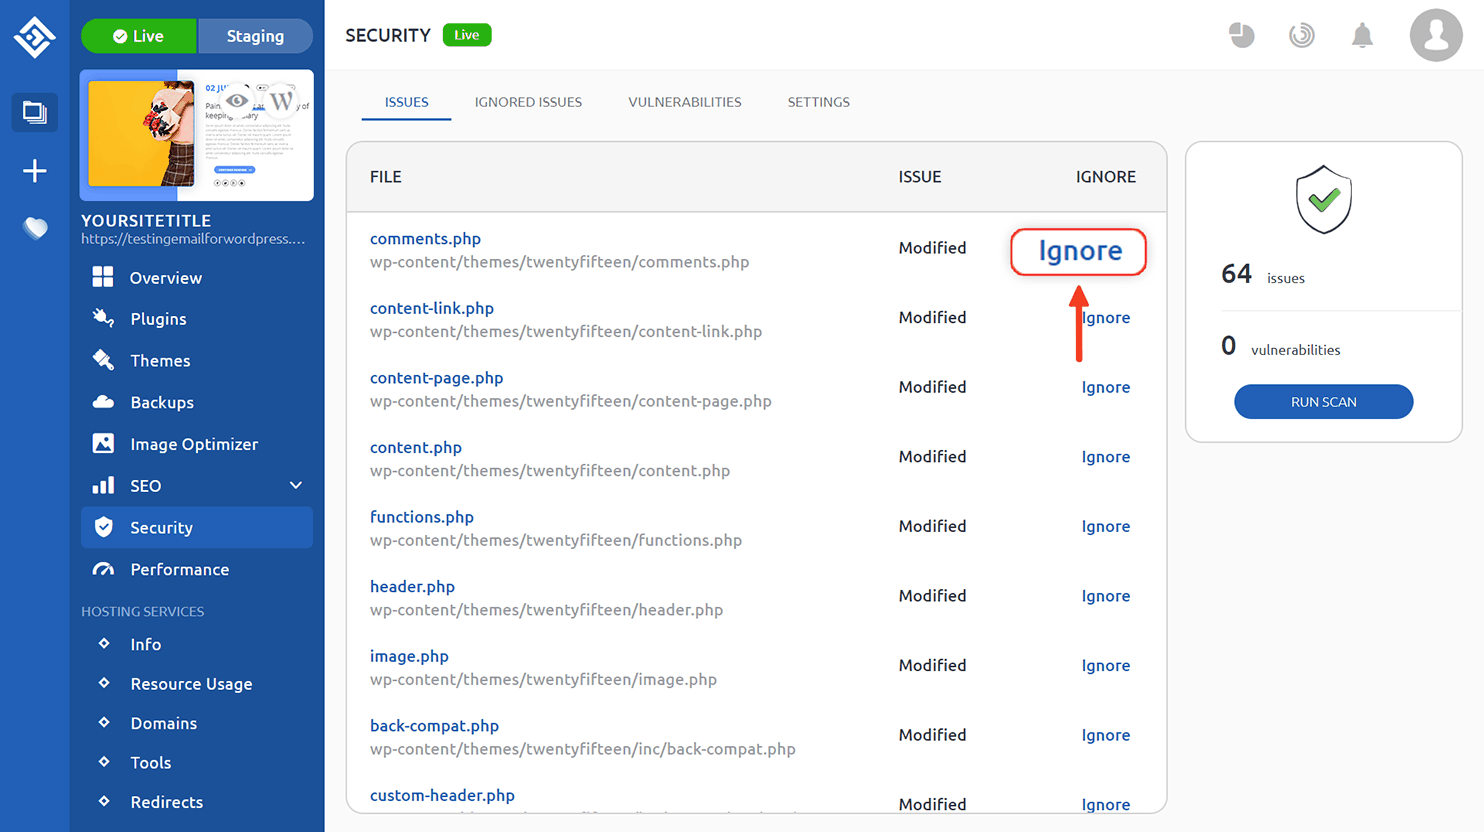
Instead, you can find them in the “Ignored Issues” tab.
Dealing with vulnerabilities
We always have the up to date database containing known WP/plugin vulnerabilities, especially those of particular versions.
If a scan reveals any vulnerabilities, you can find them in the “Vulnerabilities” tab.
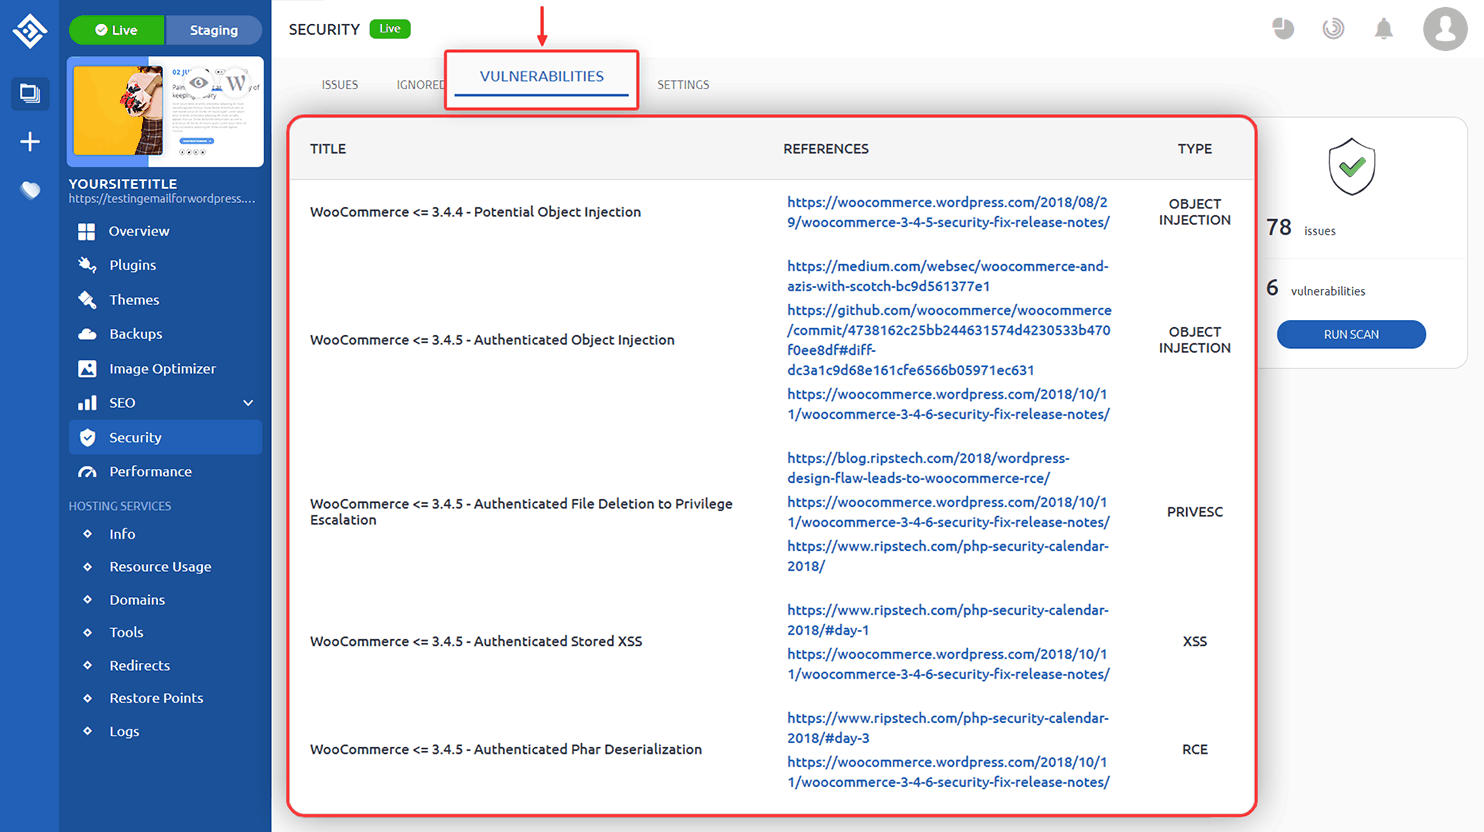
Clicking on these vulnerabilities will open a mini box with the link where you can update the plugin or WordPress to get rid of it.
This covers the basics of what you need to know about enabling and using 10Web Security service. Please don’t hesitate to comment or contact us if you have any questions. Safe sailings!
You like this article? Spread the word!